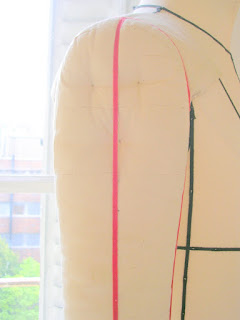
This is the last post before I fly off to Michigan. Due to time constraints (crazed) the process photos of this finished arm will be posted when I return.
This first photo shows the finished arm draped with red bolduc, plus you can see the curve of the arm which is essential in fitting. (our arms are curved therefore the mannequin arm must be curved.
 This side view of the arm simply shows how the bolduc is placed on the inside arm.
 This last view of the arm shows the shield jutting out from the top of the arm which is how the arm is attached to the mannequin body.
 This photo shows the arm after being attached, and the three dimples show how you must flatten the upper arm for the correct fall of the arm against the mannequin body.
This is a great photo of the arm after being attached and it's fall against the body and the beauty of the sculpture.

In this last photo, you can distinctly see the shield which attaches the arm to the body.
This has been such a great project to do and I love being able to share it with everyone. See you soon!!
Thanks for sharing the pictures of your mannequin arm it looks great. I do have a similar mannequin arm but without the shoulder shield. I sometimes use mine for pressing sleeves.
ReplyDelete