Tuesday, January 15, 2019
Zoe Hong MY GO TO GIRL!!!
I want to introduce you all to Zoe Hong. I LOVE this woman. She knows it all and speaks my language!! She's a great teacher and if in fact you want to know ANYTHING about the fashion industry and everything that goes into designing a fashion line and getting it produced....SHE'S YOUR GIRL....AND YOU WILL LOVE HER TOO!
She has a YOUTUBE Channel. SUBSCRIBE!!!
Monday, January 14, 2019
It's been such a long time since I posted!!! My work life has blossomed into the creation of.... Apparel Pattern Services! My menu of services includes consultation, patternmaking sampling, grading, technical packages, and sourcing. I can take the client from ideation to production! SO EXCITING!!! I love this new phase
 This particular company was a men's shirt label, very small and wanted small batch production, thus I created each size in oaktag and turned them over to the designer who had each shirt made to order. I think this was my first client. I produced a short run for him (second photo) of 24 shirts. That's when I found a fabulous sewer to do production for my clients. I dreamed of men's shirts for six months after doing THAT job!!

 Stay tuned for subsequent posts of my work and my journey!! Glad to be back ;)


I got to plan the production, create the tech pack, fine hone my grading and sewing skills and truly had a great time doing it! This client designed and produced his own printed fabrics!! What an undertaking!

Wednesday, September 28, 2016


Wednesday, March 09, 2016
basic kit for fashion illustrators
Basic tools for fashion sketching
from
GLAMNICISM
I truly love her videos. She has a lovely, relaxed and poised way of delevering her information. I feel as though I am in the room with her and she's teaching just me!
Take a moment to listen, and enjoy.
Saturday, March 05, 2016
Iris Apfel and Deborah Lloyd talk with Nadja Swarovski about the secret ...
The BRILLIANT, and ELEGANT IRIS APFEL!
Friday, February 12, 2016
COLOR!!!!
I LOVE the colors of this article from a popular fashion publication. They are bright and happy and they lighten the sky of a dreary winter! After choosing some colors from my markers I migrated to some less vibrant more spring like colors which in fact were more aligned with the Pantone Color Report for Spring, unintentionally.(The Devil Wears Prada reference here...we will tell you what colors you are thinking!!!!!) Dick Blick brush tip markers used and colors noted below.
The design is skinny jeans or leggings, touseled hair, flowing elegant sheer blouse or tunic. Boots!


The top color in the DB brush (new) markers are:
- 094 shell equal to pantone Quartz,
- 081 basic grey equal to pantone lilac grey, then for the boots,
- stone from the non brush markers DB again equal to pantone iced coffee.
- 049 dark green for the stones on the necklace,
- 005 red for the lips,
I often use pantone double end brush marker PB-78 brick beige for skintone.
I LOVE sketching and work as often as I can between designing for my upcoming pattern collection launching in late Spring 2016
(I will keep you posted), my 4 kitties and my private pattern/design clients. More soon on sketching and the Pantone Color Report for fall!
Monday, February 08, 2016
I promise I will get back to the sketching exercise, shadowing etc, BUT this article is so interesting from" the Business of fashion", I wanted to share it mostly for the path this man took and where he came from. It gives us all hope that wherever you came from and no matter how much money you don't have, you can fullfill your dreams!
Demna Gvasalia Reveals Vetements' Plan to Disrupt the Fashion System
http://www.businessoffashion.com/articles/intelligence/demna-gvasalia-reveals-vetements-plan-to-disrupt-the-fashion-system
Monday, February 01, 2016
Illustration by Connie Lim,
Collections Illustration PARIS A/W 2016

It is difficult to do a side pose well. This dynamic pose is a very effective side view and the head position/ attitude is very important for the feeling of the sketch as a whole. See others at the link below.
http://showstudio.tumblr.com/tagged/connielim
Saturday, January 30, 2016
Very nice quick sketches from the collection of Nicole Bradshaw
It is worth looking at the whole presentation.
(see link below.)

I love the development and culmination of the package. Perhaps classic, however incorporates current shapes and detail and very on point with color mix. I LOVE IT!
http://www.vogue.it/en/talents/graduated-from/2011/01/nicole-bradshaw#ad-image55254
Saturday, January 16, 2016
Kenneth Paul Block Sketches on Show in Boston
Kenneth Paul Block Sketches on Show in Boston: About 24 of the late fashion artist's sketches for
WWD are in the show, which runs until August.
http://www.mfa.org/exhibitions/kenneth-paul-block
Use the above link (cut and paste) to preview the show, about 10 wonderful sketches!

WWD are in the show, which runs until August.
http://www.mfa.org/exhibitions/kenneth-paul-block
Use the above link (cut and paste) to preview the show, about 10 wonderful sketches!
Dynamics of pose
Below is a schematic of the dynamic movement of the pose. I made a few erasures and those areas are darker (sadly). Typically a fashion sketching class allows you to view a model from afar standing in this pose. Short of having that option, I stand in front of a mirror in the pose to understand how the body moves. As an artist/maker I also need that experience to connect myself to the work.
Notice that the croquis is more of a life drawing that a true fashion croquis. That is to say she has too much volume on her frame. Understand that the job of a fashion croquis is to showcase the garments, so I will have to "slim" her quite a bit. The next post will show that step.

Thursday, January 14, 2016
Croquis Basics, choosing the photo, 1st rough sketch
I chose a photo which is a walking pose. I used the 9 heads formula. Often, the feet go in the 10th box. I elongated the fashion sketch to reflect that formula. I also made my croquis more slender than the model in the photo as this isn't a life drawing, it's a fashion sketch so it will be exagerated in many ways to be able to showcase the garments.
Notice how the shoulder line and underarm bust area are considered a block as those two lines move simaltaniously up or down from the axis of the adams apple. Next post will show all lines, s curve, torso block movement and hip block movement.
 |
| Walking pose |
Friday, January 08, 2016
croquis basics.m4v
GLAMNICISM!!!! Repost (properly) previously posted 12/6/15 and failed to include video.
I have been sketching alot for an upcoming project. The below video is the best method to understand the body in static fashion poses that I have found. This designer/illustrator has many videos where she uses this same method for building a basic croquis portfolio. I suggest finding photos of models in resort wear to be able to clearly see the body curves knee and elbow placement etc. (a suggestion I learned from Ronaldo Barnette a successful artist/illustrator/designer living, working, and teaching in New York City).
There are many videos on YOUTUBE by many illustrators noteably, Bina Abling, Kathryn Hagen, FSketcher, and the list goes on. The very most important element in becoming a GOOD freehand fashion illustrator is PRACTICE, PRACTICE, PRACTICE, PRACTICE!!!!
Thursday, January 07, 2016
Thank you Pantone!!
The Pantone color report is an invaluable FREE tool which I have relied on in my fashion illustration classes using it for color references for illustrated collections AND for myself as a designer. I post it each time it comes out for spring and for fall. Even though it is given free long after the industry receives it, (they pay big time for it) it is still a fabulous reference for reflection on our purchases, and for start-up designers fashion and interior.
Now, they have come out with yet another fabulous tool free of charge to reference, combine and amalgamate color! Go to the website below and experiment, it's exciting, very educational and FUN to play with!
http://www.pantone.com/pages/pantone/index.aspx

Wednesday, January 06, 2016

Monday, January 04, 2016
It's the new year! Set your mind toward DESIGN and be inspired by
THE CUTTING CLASS blogpost:
http://thecuttingclass.com/post/136598499908/thinking-like-a-designer
I know I always am....
I may not always like or understand perhaps what any one designer puts together but it is always an education in the elements and principles of design.
http://flyeschool.com/content/elements-artdesign-and-principles-designorganization
I study, interpret, view from all angles or all that apply, how can this influence me consciously, unconsciously? I immerse myself for the moment to absorb all it's aspects and I become lost in the dream of design...heaven sometimes.
THINKING LIKE A DESIGNER
"In this final round-up post about the articles from 2015, we’ve gathered together some food for thought if you are about to become a fashion designer, or fashion design student yourself. From sketching designs to communicating with pattern makers these 2015 articles give you an insight into the analytical mindset of a designer. Does the toile match the sketch? Are you translating the idea correctly into the pattern? Where do you draw the line when using deconstruction to express a concept? Is the balance of fabrics right in the collection?"Friday, December 18, 2015
Thursday, December 17, 2015
The following is a post from
"the cutting class"
an insightful critique of couture and ready to wear for architects of garments, lovers of fashion, and students wanting to understand more about the world of design and the beauty of construction. I learned about this blog from "The Center for Pattern Design" another fabulous site for the lovers of garment architecture.
Copy and paste this to follow them.
http://thecuttingclass.com/post/135337014769/pattern-making-details-from-2015
ENJOY!!!!!
PATTERN MAKING DETAILS FROM 2015
In order to put the year into context, it seems like a good time to revisit some of the details that piqued our interest in 2015. Over the next few weeks we’ll revisit some of the year’s most popular articles to give you a chance to catch up on some of the dart permutations you might have missed.
Pattern making details are often the easiest to appreciate when the garment has minimal embellishment, and the collection of articles below highlight some of the pattern making manipulations at work in the collections at Dior, Balenciaga, Delpozo and DZHUS. As is so often the case with sewing and fashion design it is the simple details that are often the hardest to create since there is no room to hide. In the case of many of these garments, minimal seam lines and scant use of darts gives the pattern maker very little room to manipulate for fit changes. The solution is often to maximise how much extra give you can get out of the fabric by using the grain line to your advantage and by easing in small amounts of fit value along the seam line. To achieve this effect, many designers find it more straight forward to work directly on the stand to shape the fabric since any shaping and changes are more tangible than what can be achieved by flat pattern making alone.
Christian Dior, SS15, Haute Couture, Paris.
In discussing some of the details from the Balenciaga Pre-Fall 2015 collection, we began to discuss how moving the positions of panel lines can affect your ability as a pattern maker to fit the fabric to the body. As it happens the Christian Dior Haute Couture collection for Spring-Summer 2015 included garments that pushed panel lines away from the bust point apex to achieve slightly different fit variations on one basic sleeveless silhouette.
Balenciaga, PF15, Paris.
Sometimes a design that is very simple on paper can throw some surprisingly tricky pattern considerations at you. There was one particularly simple dress from the Balenciaga pre-collection that illustrates a possible solution to an important question: When you move a seam line away from an apex of the body, what are your pattern options to keep the same fit value?
Balenciaga, AW15, Paris.
Some time ago, we discussed some of the different ways you can position fabric on the body to create different sleeve shapes. In particular, there are many different design possibilities that open up to you when you give up on the typical bodice / sleeve arrangement and start to blur the positions of these garment parts to create more unusual silhouettes. In this post, we’ll look at the cocoon shaped coats and jackets from the Balenciaga collection for Autumn-Winter 2015 to look at how the fabric has been shaped in these garments.
Christian Dior, SS16, Paris.
After the recent news that Raf Simons would no longer be the artistic director at Dior (for women’s RTW, Haute Couture and accessories), it seemed a fitting time to celebrate the fineness of the construction details in his last collection for Spring-Summer 2016. After all, it’s possible that not everyone heard the news that Simons was leaving Dior and felt saddened by the thought that in future there may be a little less bust dart inspiration in the world.
Delpozo, AW15, New York.
The Delpozo collections often use clever pattern cutting details to create sculptural details or to support the silhouettes of the garments. In the Autumn-Winter 2015 collection some of the pattern making details worth noticing include sleeves that grow from panels or out of darts, and a sleeve that appears to be a variation on a raglan sleeve.
DZHUS, “Totalitarium”, AW15, Kiev.
The Autumn-Winter 2015 collection for DZHUS was filled with geometric details that used tucks and pleating to fold fabric around the body. Designer Irina Dzhus spoke to us about her pattern making process for the collection and discussed how fabric choice can make the difference between a piece being regarded as a wearable garment or sidelined as a concept piece.
See all articles on Pattern Making Techniques»
Monday, December 14, 2015
I came across this fabulous blog from South America! Patternmakers are visual/intellectual/sculpture artisits, engineers too!! This visual for where the cuts, and manipulations occur on the block are invaluable. It's a free educational blog (in spanish). Don't know spanish, no problem. The commentary is usually only a description, the schematics are the teachers.
https://www.mmodelista.blogspot.com/2015/12/a3-numo-0165-dress-reveillon-red.html?spref=fb
 You must have a basic knowledge of patternmaking, curiosity, perseverance and a good basic patternmaking book. I recommend this one below.
Here is the reason, It is simple and takes you through the very basics. That's all you need if you are a novice. There are other fabulous books and if you love patternmaking as I do, you'll buy them. Start with this one..it's not confusing.

See more at: http://www.bloomsbury.com/us/basic-pattern-skills-for-fashion-design-9781563678349/#sthash.wQCYV5lY.dpuf
Ask me questions, and keep checking in! A bientot!
Sunday, December 06, 2015
basic shading process #1: the body (croquis mailing VIA GLAMNICISM.COM, ...
I am spending alot of time sketching for my future project at the moment. In researching books and tutorials, this YOUTUBE channel produces some great tutorials on many apects of your croquis drawing with specific verbal cues. VERY GOOD!
Friday, October 23, 2015
Technical/architecture/sculpture/engineering
"thesewingforum.co.uk"
on mannequin padding/building
on mannequin padding/building
AMAZING POST FROM "thesewingforum.co.uk" This is the most comprehensive, beautifully done and well explained building/padding of a mannequin to fit an individual which I have ever seen. Although a bit technical compared to FASHION...this is what makes your work, well.............. work! The only comment I have is the placement of the ribbons below the waist. (3rd photo). They should but as straight as possible. The princess line that is. They may be a slight curve but straighter than curvier. Any line will vary greatly in the toile, if it starts out curved, the finished line will be even more exagerated.

Look for a new post about mid week on collections!
Materials
Approx 1m 8oz wadding 1m 4oz wadding (optional) 4 large dishcloths or roll of stockinette 1 bag of toy stuffing Curved needle 3 reels of upholstery thread Approx 1.5m heavy calico or ticking Approx 10m narrow, black cotton tape My dressform has always been a source of deep dissatisfaction to me because it just isn’t possible to get it to represent my shape. I have a narrow back and chest, next to no bum and a full bust. Oh, and the nasty, loopy, plushy nylon fabric gives me hangnails. Another big annoyance was that all the places I wanted to place a pin were represented by gaps. Centre front, back and side seams all gaps, not tapes. There was no point in buying a Stockman or K&L as I would be paying for something which represented the average form, which I was not. So I decided to modify my existing dummy. The first step was to cover the existing dummy in stockinette so I had something easy into which to anchor some stitches. Next I placed one of my bras onto the dummy, secured it firmly and stuffed it out with toy stuffing. A full cup bra is best for this. I then covered the bra area with another layer of stockinette and padded out any gaps. I used some tape to hold down the stockinette close to the body. The next step is to encase the whole dummy with layers of 8oz wadding, cut in a sort of princess line to mould around the bust. I drew up the pieces tightly and stitched them together to form a tight casing. Using a curved needle I sewed small stitches across the whole surface of the wadding, drawing it in flatter, compressing the fibres and giving a springier, firmer base into which I could pin.  Extra contours were built up with patches sewn on, added to and drawn down with stitching until the correct shape and dimension was reached. It is essential to keep measuring so that you’re sure that the inches are going on the right places. An extra inch may not need to be put on all around. I made a mistake with mine in that it just looked, at one stage, much, much too barrel shaped. I am quite slender from the side and this wasn’t. Realising I had overestimated my ‘mummy tummy’ I took some off there and added the extra to the sides of my waist instead. I created the mummy tummy by sewing on a circular patch, leaving the top edge open and stuffing with toy stuffing before sewing the pouch shut at the top. This was then stitched down and formed just the right bump. Once I had the wadding all in place I added a second layer in 4oz wadding, lightly secured in place at the seams. Unlike the first layer it does not need to be compressed by stitching across it. This is because the first layer was intended to give a springy but substantial layer into which I could drive pins but this second layer was to smooth out any unevenness and create a looser, more spongy layer that could easily be compressed by my 'tight lacing' the outer shell. This second layer should leave the dummy an inch or two bigger than the finished size. This is necessary because the cover will be drawn in and stitched very tightly, pulling the form in a little further so if it is not to end up too small, it must reach this stage slightly too large. This in place, progress ground to a halt while I made some decisions about how best to approach the outer shell. Traditionally the method for this style of dummy is to wrap loads and loads of wadding (kapok,or cotton wool) around the dummy, make the shell as a tight toile fitted to the body and then padded out with more kapok to make it solid. I have instructions for this method in an old needlework book but the finished item features a flattened mono-bosom rather than the cross-your-heart, lifted and separated silhouette I needed for mine. I make a lot of v-neck and cross-over garments so it is vital for me to be able to see where my sternum lies if I am not to end up with garments gaping at the neck. I had to find an alternative method and this caused me a lot of headaches. Firstly, I wanted to cover the bust as two independent hemispheres with the sternum drawn down tight. I decided to base the cover on a princess line as I could then shape the panels to cope with the bust issue. I started by drafting a basic bodice block according to my measurements. My bust is large so requires much wider darts going into the waist seam than those which go from waist to hip so I always draft my bodice block to the waist only and do from waist to hip separately, as a skirt block. Using my own measurements gave me a very odd armhole which I had to override and redraw according to common sense and after the first toile I also moved the bust point and shoulder dart. Next, I created a second block based on this but with the armhole dart closed and pivoted into join the waist dart. I chose to swing it here rather than split it between shoulder and waist as because of my bust size my waist is comparatively close to my bust line so an exaggerated dart would be very helpful for gaining the close fitting silhouette I desired. I then created a princess block from this draft and married the skirt block into it so I ended with eight hip-length panels plus a little extra to turn under and take a drawstring for closing it under the bottom edge of the dummy. Then I cut out the pieces and stitched them together, leaving one of the side seams open which would be hand stitched once the cover was in place on the dummy. I would then hand-stitch the other seams again with a curved upholstery needle and strong, upholstery thread, pulling the cover tighter by so doing. I wasn't happy with the central, waist section - I had adjusted the shoulder and neck quite a bit so whilst the length was fine at the front it now needed a little extra length at the back. So rather than go out and buy more calico and start again I cut the cover in half at the waist, moved the bottom half down a little and then added a new section around the middle and stitched and shaped it into place. I had to do quite a lot of yanking and dragging and strong stitching and my panel seams were far from the perfectly even ones you see on the professional dummies but I kept the stitches small and closely spaced and eventually my little Frankenstein's Monster came together. I have added narrow black cotton tape to the construction lines so that I can pin and drape with confidence. My dummy resembles me in proportions, in dimensions and most important of all, in balance front-to-back. At last I can model garments on the stand which I can personally wear.   
__________________
 |
Sunday, October 18, 2015
WHAT IS HAPPENING NOW???
THE PANTONE COLOR REPORT FOR SPRING 2016....GREAT FOR FASHION SKETCHING.......GREAT DIRECTION ON COLOR TRENDS!

USE THIS LINK, AND REGISTER TO RECEIVE THE COLOR REPORT FREE!!!
http://www.pantone.com/pages/fcr/?season=spring&year=2016
Tuesday, March 10, 2015
Saturday, October 20, 2012
 | ||||||
| Above is a darling pattern by SALME (independent pattern company) from the great site CRAFTSY. Gotta say, I am so impressed with the choice of fabric. I believe that this is the key to this simple design. Layering this piece over cream, over or gold/ silver for the holidays will be great. Next post is the fabrication...stay tuned!! |
Thursday, September 13, 2012

Friday, September 07, 2012


Monday, August 20, 2012
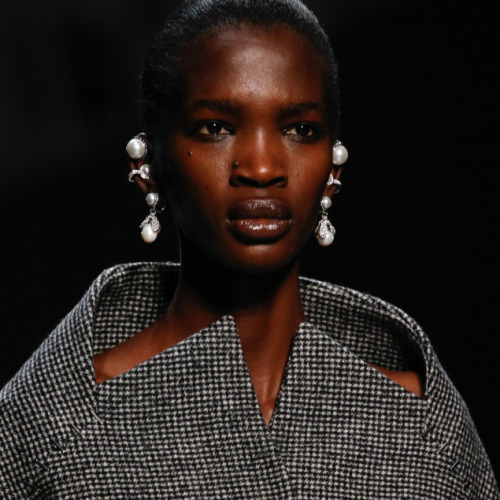
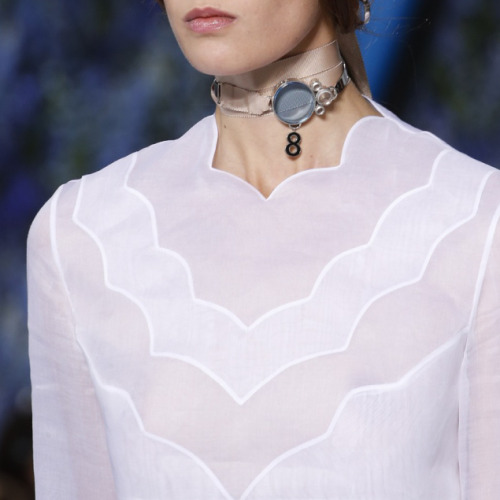
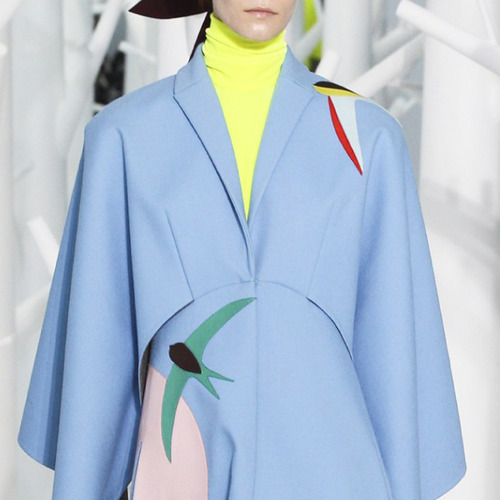
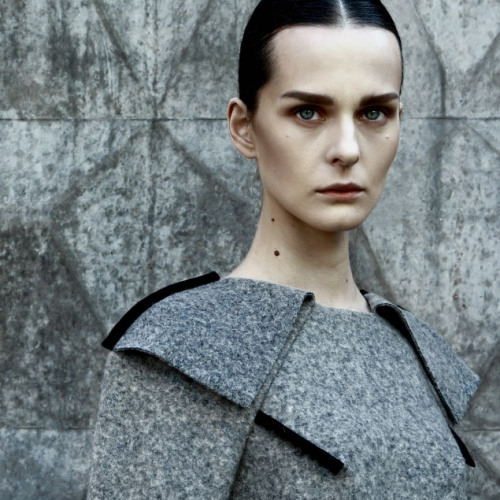
images that linger from Paris
FABULOUS new toy from POLYVORE. Create as many mood boards for all your alter egoes.............have FUN!!


Tuesday, January 24, 2012
 A wonderful new space for my patternmaking and draping classes. Clean, airy, natural light, fabulous big tables and LATTES, YES! LATTES right next door! Could not be better, really.
My raspberry wool coat and mini are underway, slowly but surely. Progress on my work and the students work will be shared as the weeks go by. Enjoy your every creative moment!
Subscribe to:
Posts (Atom)